
How to Bake Cookies Into Bars?
Looking to save time and space in the kitchen while still enjoying delicious homemade treats?
We explore the benefits of baking cookies into bars – a time-saving, easy-to-store, and versatile option for your baking needs.
From preparing the cookie dough to adding extra ingredients for flavor and texture, we guide you through the process of creating perfectly baked cookie bars.
Plus, we provide you with some mouth-watering recipe ideas to inspire your next baking adventure.
Stay tuned for all the tips and tricks you need to master the art of cookie bars!
Key Takeaways:
Why Bake Cookies Into Bars?
Baking cookies into bars offers a convenient and time-saving alternative to traditional cookies, making it easier to prepare and store delicious treats for later indulgence. This method allows for a versatile and customizable approach to baking, giving you the freedom to experiment with different flavors and textures in a single batch.
By baking cookie bars, you can save time on shaping individual cookies and monitoring multiple batches in the oven, as the entire dough is simply pressed into a single pan for baking. This efficient method not only streamlines the baking process but also minimizes clean-up time with fewer utensils and trays to wash.
The convenience extends to storage options, as cookie bars are easier to stack and pack in airtight containers or freezer-friendly bags, allowing you to enjoy your favorite treats over an extended period without compromising taste or texture.
Time-Saving
Baking cookies into bars is a time-saving technique that allows you to prepare a large batch of treats in one go, reducing the overall baking time and effort required. This is especially beneficial for busy individuals, new parents, and anyone facing a time crunch.
With this method, you essentially streamline the traditional cookie-making process, eliminating the need for constantly monitoring multiple batches in the oven. Instead, you can simply press the dough into a single pan, bake, and slice into perfectly portioned bars once cooled.
For busy parents, this approach provides a quick yet flavorful treat option that can be easily enjoyed on the go or shared with the whole family. It offers a convenient way to satisfy sweet cravings without spending hours in the kitchen. The versatility of cookie bars also allows for customization with various mix-ins, toppings, and flavors, catering to different preferences effortlessly.
Easy to Store
Cookie bars are not only time-savers in the baking process but also in storage. Their convenient shape and consistency make them easy to stack, store, and grab on the go. This is particularly advantageous for those balancing a busy schedule or caring for a newborn.
The storage advantages of cookie bars extend beyond their initial creation. Regarding storing these delectable treats, their compact nature allows them to be neatly organized in containers or airtight jars without the risk of crumbling or breaking. Freezing cookie bars for later consumption is a practical option that locks in their flavor and freshness, ensuring that a delicious snack is always within reach for individuals with hectic lifestyles.
Versatile and Customizable
The beauty of baking cookies into bars lies in their versatility and customizability.
One fun aspect of making cookie bars is experimenting with different dough textures and thicknesses, allowing for a chewy or crispy finish based on personal preference. Adding a variety of ingredients like nuts, dried fruits, or chocolate chips can enhance the flavor profile and add a delightful textural contrast.
- For those looking to bake in large quantities, simply adjust the ingredient volumes accordingly to yield more bars without compromising on taste.
- Regarding slicing, ensuring that the bars are completely cooled before cutting will help maintain their shape and prevent crumbling.
- For individuals seeking gluten-free options, incorporating ingredients like almond flour or gluten-free oats can produce delicious cookie bars with a satisfying texture and taste.
What Type of Cookies Can Be Baked Into Bars?
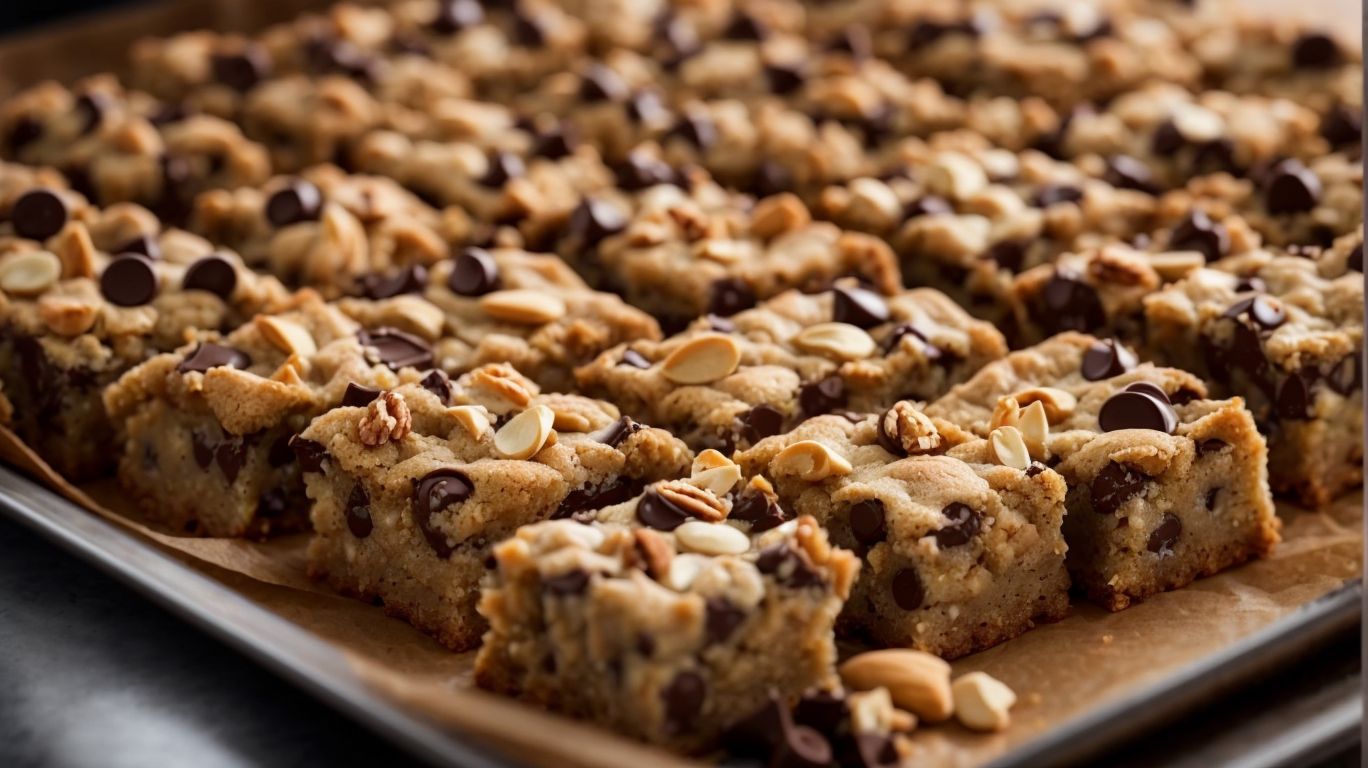
Various types of cookies can be transformed into delectable bars, including classic favorites like chocolate chip, oatmeal, and peanut butter. By adjusting the baking process and utilizing the right techniques, you can enjoy these cookie variations in a convenient bar form.
Regarding creating cookie bars, the key lies in finding the perfect balance between the chewiness of a cookie and the firmness of a bar. For chocolate chip cookie bars, ensuring the right amount of chocolate chunks are evenly distributed across the batter is crucial, while keeping the bars soft on the inside yet slightly crispy on the edges. Oatmeal cookie bars benefit from a generous sprinkle of oats on top for that wholesome texture, imparting a delightful crunch with each bite. Peanut butter cookie bars require a smooth and creamy blend of peanut butter to infuse that unmistakable nutty flavor, resulting in a rich and indulgent treat.
Chocolate Chip Cookies
Chocolate chip cookies are a beloved classic that can be elevated into decadent bars. With the right dough preparation and baking technique, you can enjoy the rich flavors of chocolate chips in a crispy or chewy bar form.
When transforming cookies into bars, achieving the perfect dough consistency is crucial – not too dry to crumble, yet not too wet to become dense. This balance ensures the bars hold their shape while offering a delightful chewiness. Consistency is key here. Adjusting oven temperature plays a vital role in determining the texture. A slightly lower temperature can yield a softer, moister bar, while a higher temperature can result in a crispy, caramelized finish.
Oatmeal Cookies
Oatmeal cookies are a wholesome treat that can be transformed into hearty bars with a delightful chewiness. By adjusting the baking time and incorporating chocolate chips or other mix-ins, you can create flavorful oatmeal bars to enjoy any time.
One of the great things about turning oatmeal cookies into bars is that it not only changes the presentation but also enhances the texture. The oatmeal base provides a robust and satisfying chewiness that makes these bars a favorite among many. Plus, the versatility of these bars allows for endless customization. Whether you prefer the classic addition of chocolate chips or want to experiment with nuts, dried fruits, or even a swirl of caramel, there are countless ways to elevate the flavor profile of these delicious treats.
Peanut Butter Cookies
Peanut butter cookies can be transformed into rich and satisfying bars that showcase the nutty goodness of peanut butter in each bite. By adjusting the dough consistency and baking temperature, you can achieve the perfect balance of texture and flavor in these delectable bars.
To convert peanut butter cookies into bars, start with a classic peanut butter cookie dough recipe. The key is to press the dough into a baking pan, creating a uniform layer for even baking. This process allows the flavors to intensify, resulting in a more concentrated peanut butter taste. When baking, keep an eye on the bars to ensure they reach the desired texture – whether you prefer a thicker, chewier bar or a thinner, crispier one. The magic lies in finding that sweet spot where the bars are moist yet firm, delivering a burst of nutty richness with every bite.
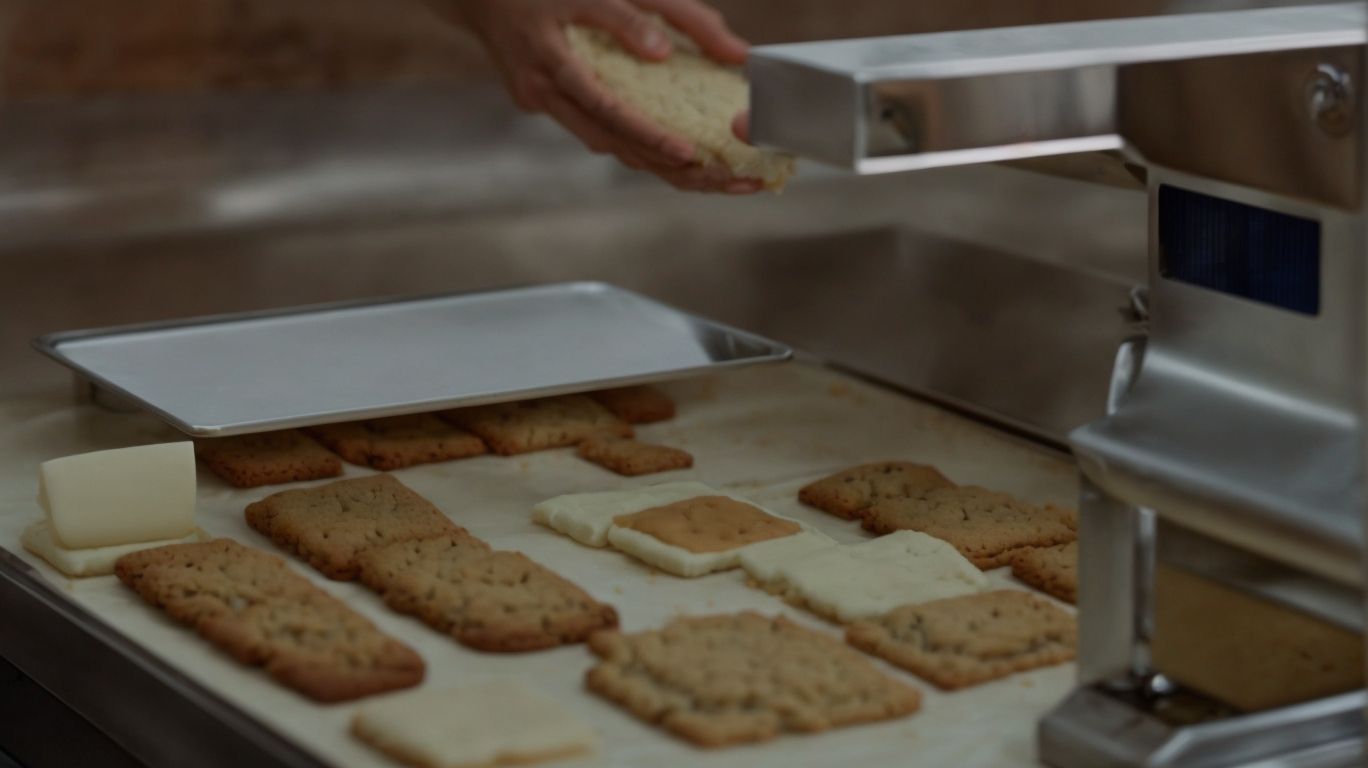
How to Bake Cookies Into Bars?
Credits: Poormet.Com – Andrew Hall
Baking cookies into bars involves a few key steps to ensure a successful outcome.
It’s crucial to prepare the cookie dough using your favorite recipe, gathering ingredients like flour, sugar, eggs, and butter. Consistency is key here; the dough should be well mixed and uniform in texture for even baking.
Next, transfer the dough to a greased pan, using a spatula to press it down firmly and evenly. Once in the oven, keep a close eye on the bars, as overbaking can lead to dryness. After baking, allow the bars to cool completely before slicing into neat squares to preserve their chewy goodness.
Preparing the Cookie Dough
The first step in baking cookies into bars is preparing the perfect cookie dough. Whether it’s a chocolate chip base or a classic sugar cookie, ensuring the right texture and consistency is key to achieving delicious and satisfying bars.
To achieve the desired texture for your bars, pay attention to the dough’s moisture content; for a chewier bar, slightly increase the amount of flour or use brown sugar for a richer flavor. If you prefer a crispy texture, consider reducing the amount of butter or adding an extra egg for a moist finish. Incorporating ingredients like vanilla extract or almond meal can enhance the overall flavor profile of your bars.
Pressing the Dough Into a Pan
Once the cookie dough is ready, the next step is to press it evenly into a baking pan for uniform bars. Using parchment paper or greasing the pan can help prevent sticking and ensure easy removal after baking, providing a hassle-free experience.
Smooth pressing the dough into the pan ensures that the bars cook evenly, resulting in a consistent texture throughout. A handy tip is to place another piece of parchment paper on top of the dough while pressing to prevent it from sticking to your hands or utensils. This method not only aids in achieving a seamless surface but also eases the cleanup process later on. For an extra touch, gently using a flat-bottomed glass can help compact the dough further, creating a firmer base for your delicious bars.
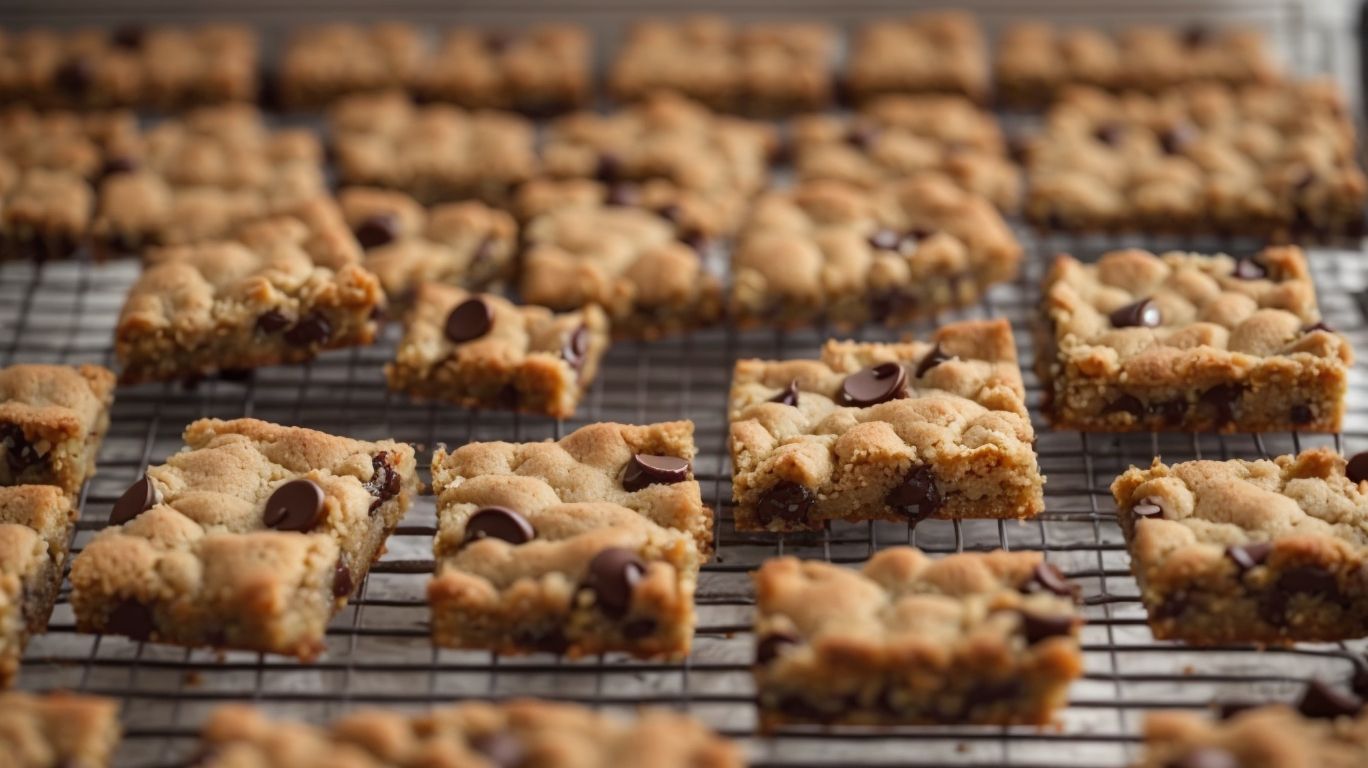
Baking and Cooling
Baking the cookie dough to perfection is crucial for achieving the desired texture and flavor in your bars. Monitoring the oven temperature and baking time ensures that the bars come out golden brown and delicious. Once baked, allowing them to cool properly enhances their taste and consistency.
It is essential to pay close attention to the oven temperature throughout the baking process. Fluctuations in heat can result in unevenly cooked bars, affecting both taste and texture. Adjusting the baking time based on your oven’s performance is key to avoid undercooking or overbaking your bars.
By striving for that perfect golden brown hue, you’ll be treated to a visually appealing and flavorful batch of cookie bars. The caramelization of sugars in the dough at the right temperature is what gives them that irresistible taste. It’s the small details, like achieving the ideal color, that can make a significant difference in the final product.
Tips for Perfectly Baked Cookie Bars
Credits: Poormet.Com – Carl Brown
Achieving perfectly baked cookie bars requires attention to detail and some helpful tips to ensure a successful outcome. From selecting the right pan to adjusting baking time and temperature, incorporating these guidelines can elevate your cookie bars to a new level of deliciousness.
Regarding selecting the right pan for your cookie bars, opt for a light-colored metal pan to prevent over-browning. Dark-colored pans tend to absorb more heat, which can result in quicker and uneven baking. To ensure even baking, consider using an aluminum pan with straight edges.
For different recipes, remember to adjust the baking time and temperature accordingly. A good rule of thumb is to decrease the temperature by 25°F if using a glass pan and increase it by 25°F for a non-stick metal pan.
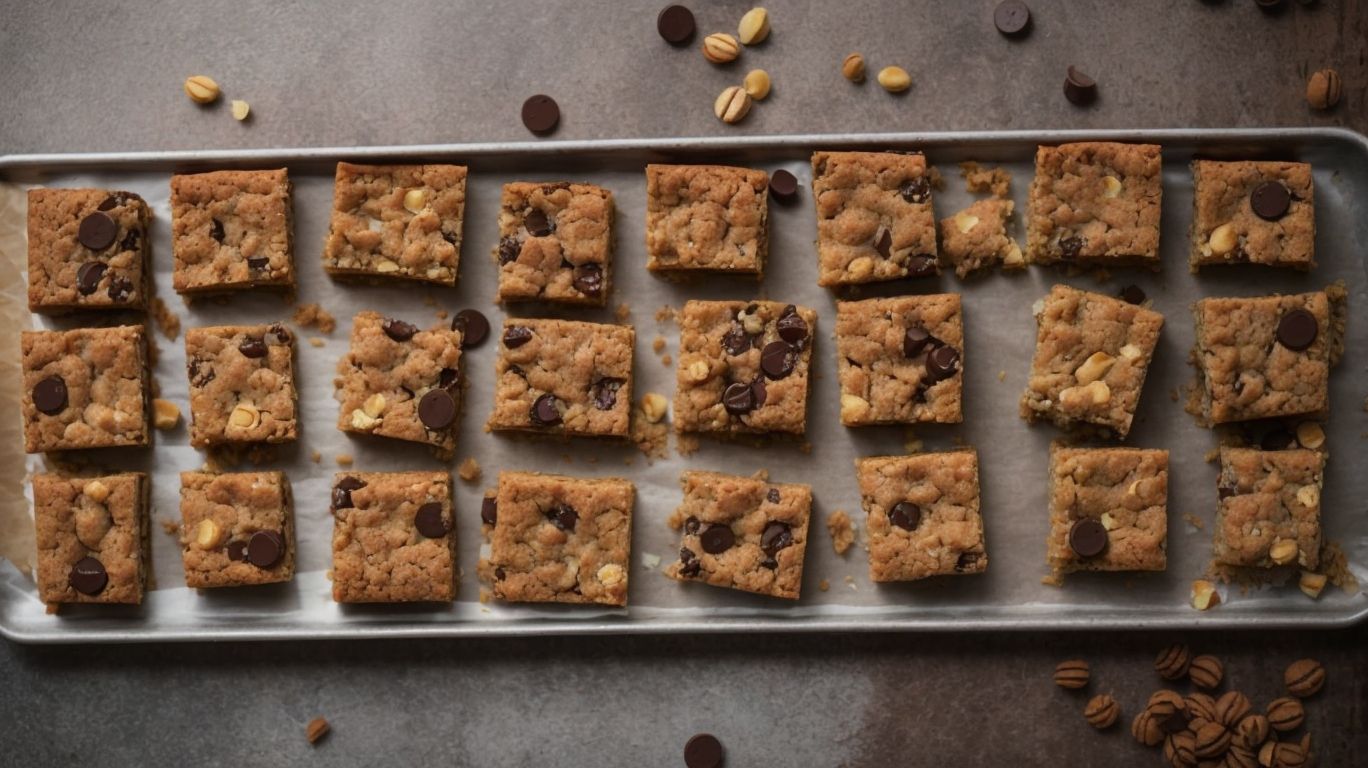
When handling a big batch of cookie bars, divide the dough evenly to promote uniform baking. You can also use parchment paper to line the pan, making it easier to lift the bars out for slicing.
After baking, allow the cookie bars to cool completely in the pan on a wire rack. This helps in setting the bars and makes slicing them easier. For clean and uniform slices, use a sharp knife and wipe it between cuts.
Use the Right Pan
Selecting the appropriate pan for baking cookie bars can significantly impact the outcome of your treats. Opt for a pan that promotes even baking, allows for easy slicing, and simplifies the cooling process. Using parchment paper can further streamline cleanup and bar removal.
Regarding achieving those perfect, chewy, and delicious cookie bars, having the right pan is crucial. Even heat distribution is key in ensuring that your bars bake uniformly, avoiding overdone edges or under-baked centers. An ideal pan for cookie bars should also have straight sides, making it easier to cut neat, uniform slices. Consider investing in pans made of heavy-gauge metal for durability and consistent browning. For different bar sizes, opt for pans ranging from 9×13 inches for thicker bars to 10×15 inches for thinner ones.
Adjust Baking Time and Temperature
Fine-tuning the baking time and temperature is crucial for achieving the desired texture and consistency in your cookie bars. Whether you prefer them thick and chewy or thin and crispy, adjusting these factors can make a significant difference in the final outcome.
For thick and chewy cookie bars, consider lowering the oven temperature slightly and extending the baking time. This method allows the bars to cook more slowly, resulting in a denser texture. Conversely, if you’re aiming for thin and crispy bars, a higher temperature and shorter baking time will help achieve that crunch you crave.
Testing the doneness of cookie bars can be tricky, but a simple trick is to insert a toothpick in the center; if it comes out clean or with a few moist crumbs, they’re ready.
Add Extra Ingredients for Flavor and Texture
Enhancing your cookie bars with extra ingredients can elevate their flavor profile and texture, creating a more indulgent and satisfying treat. Whether it’s adding chocolate chips, nuts, or dried fruits, these enhancements can turn ordinary bars into extraordinary delights.
For a twist on traditional recipes, consider incorporating unconventional mix-ins such as pretzels, caramel bits, or even marshmallows to add a unique contrast of flavors and textures.
Experimenting with different types of chocolate like white chocolate, dark chocolate, or even flavored chocolates can offer a diverse range of taste experiences.
Don’t forget to explore options like toffee bits, shredded coconut, or spices like cinnamon or nutmeg to infuse your cookie bars with an extra layer of complexity and warmth.
Recipe Ideas for Cookie Bars
Credits: Poormet.Com – Jack Jackson
Explore a world of delightful flavors with these creative recipe ideas for cookie bars. From indulgent salted caramel chocolate chip bars to nostalgic PB&J oatmeal bars and refreshing White Chocolate Cranberry Bars, there’s a perfect treat for every occasion and taste preference.
For the salted caramel chocolate chip bars, you’ll enjoy the sweet and salty contrast, with gooey caramel pockets nestled within a chewy chocolate chip cookie base. To make the PB&J oatmeal bars, the blend of nutty oats with fruity jam creates a comforting and classic combination reminiscent of childhood lunches. Moving on to the White Chocolate Cranberry Bars, you’ll savor the tangy dried cranberries paired with the creamy sweetness of white chocolate, adding a festive touch to the cookie bar lineup.
Each recipe offers room for customization, whether you prefer a thinner or thicker cookie base, extra toppings, or a drizzle of additional sauce or chocolate. Enhance the flavors further by incorporating a sprinkle of sea salt, a dash of cinnamon, or even a splash of citrus zest to elevate the taste profile and make these cookie bars truly your own.
Salted Caramel Chocolate Chip Bars
Indulge in the perfect blend of sweet and salty with these decadent salted caramel chocolate chip bars. The rich chocolate flavors combined with gooey caramel and a hint of sea salt create a heavenly treat that will delight your taste buds with every bite.
Creating these bars involves a careful balance of ingredients to ensure the desired contrast between sweetness and saltiness. To start, combine butter, brown sugar, and vanilla extract for a rich caramel base. Add a generous amount of chocolate chips to infuse the bars with indulgent flavor.
For the perfect gooey texture, bake the bars just until the edges are golden brown while the center remains soft and chewy. Sprinkle a pinch of sea salt over the top before baking to elevate the flavors and create a delightful salty-sweet combination.
PB&J Oatmeal Bars
Bring back childhood memories with these nostalgic PB&J oatmeal bars that combine the classic flavors of peanut butter and jelly in a convenient and delicious form. The hearty oatmeal base adds a wholesome touch to this beloved treat.
For those craving a twist on the traditional peanut butter and jelly sandwich, these oatmeal bars are a delightful alternative. The process of making these bars is straightforward and perfect for beginners or seasoned bakers looking for a quick and tasty treat. Packed with the goodness of oats, peanut butter, and strawberry jelly, these bars offer a chewy and comforting texture, ideal for snacking or as a sweet breakfast option. The blend of nutty and fruity flavors creates a harmonious balance that will surely transport you back to carefree childhood days.
White Chocolate Cranberry Bars
Experience a burst of flavor with these elegant White Chocolate Cranberry Bars that combine the sweetness of white chocolate with the tartness of cranberries. The festive colors and delightful taste make these bars a perfect holiday or special occasion treat.
These delicious bars are a wonderful addition to any dessert spread, offering a perfect balance of flavors that will impress your guests. To make these decadent treats, start by preheating your oven and preparing a baking dish with parchment paper. Combine the butter, sugar, eggs, and vanilla extract in a mixing bowl, then gradually add the flour and white chocolate chips until a smooth batter forms.
Gently fold in the dried cranberries to ensure an even distribution of the tart fruit throughout the sweet batter. Pour the mixture into the prepared baking dish, spreading it evenly to create a uniform layer. Bake the bars until they are golden brown and set, allowing the enticing aroma to fill your kitchen.
Frequently Asked Questions
1. How do I convert a cookie recipe into a bar recipe?
To convert a cookie recipe into a bar recipe, you will typically need to increase the amount of butter and sugar in the recipe. This will help the bars hold their shape and stay moist, similar to a cookie dough. You may also need to adjust the baking time and temperature to ensure the bars are fully cooked.
2. Can I use any type of cookie dough for baking into bars?
Yes, you can use any type of cookie dough for baking into bars. However, it is important to consider the texture and consistency of the dough. Softer, chewier doughs may work better for bars, while crispier doughs may not hold together as well.
3. Do I need to line my pan with parchment paper when baking cookie bars?
It is not necessary to line your pan with parchment paper when baking cookie bars, but it can make removal and clean up easier. If you choose not to use parchment paper, be sure to grease the pan well with butter or cooking spray to prevent the bars from sticking.
4. How do I know when cookie bars are fully cooked?
The best way to tell if cookie bars are fully cooked is by inserting a toothpick into the center. If it comes out clean, the bars are done. You can also gently touch the center of the bars – if they feel firm and spring back, they are likely fully cooked.
5. Can I add mix-ins to my cookie bar recipe?
Yes, you can add mix-ins to your cookie bar recipe, just like you would for regular cookies. Popular mix-ins for bars include chocolate chips, nuts, and dried fruit. Just be sure to distribute them evenly throughout the dough before baking.
6. Do I need to let cookie bars cool before cutting and serving them?
Yes, it is important to let cookie bars cool completely before cutting and serving them. This allows them to set and hold their shape, making them easier to handle and less likely to crumble. For best results, let the bars cool in the pan for about 20 minutes before cutting.